Fun With ‘Phones

They’re an essential part of a radio orienteer’s equipment. Without them, your receiver would be worthless. Some prefer headphones, others earphones. But whichever you choose, you want them to be comfortable and secure and to deliver ample sound to your ears.

It is true that, in a pinch, just about anything that delivers sound waves to your eardrums will get the job done. But high-fidelity audio has its benefits. It allows knowledgeable radio orienteers to discern perturbations in the received signal that distinguish reflected signals from the direct signal or to accurately gauge a subtle climb in signal strength confirming progress made toward the fox. So your choice of earpiece can make a difference. Here are some things to consider when selecting your radio-orienteering ear gear.

Once upon a time, it was easy to find single-ear and monaural 2-ear devices. These are almost nonexistent today, so they will not be discussed here. Only stereo 2-ear devices are considered. Almost as long ago, high-impedance headphones and earphones were widely available and would be incompatible with most radio orienteering receivers built in the past 20 years. That’s something to be aware of if you scrounge the junk box for old earpieces. Most new earphones and headphones are ~32Ω impedance, and most radio orienteering receivers sold today are designed to work with them. So don’t be too concerned about impedance unless you are dealing with older or homebuilt equipment.

High-end headphones and earphones may not be what you’ll want to wear while running through the woods in all kinds of weather. Although high-end earpieces should work very well for radio orienteering, and come with lists of cool features commensurate with their price tags, you are unlikely to find waterproof listed among their features. And Bluetooth connectivity, if required, will likely entail adding a Bluetooth transmitter (covered below) to your receiver to make it compatible. Noise cancelation would be a nice feature to have, and a pass-through mode for holding conversations would be sweet. But along with such features comes the need for the headset to have its own battery, which must be kept charged. In the end, most of us will find simple wired headphones and earphones work just dandy for this sport.

Headphones or earphones? Headphones are worn entirely outside your ear. Earphones go just inside your ear. Both are suitable for radio orienteering. Let’s explore them.

Headphones

Headphones come in two types: over-the-ear and on-the-ear. As their name suggests, over-the-ear headphones feature ear cups that entirely surround the ear and have padding that rests against the side of the head.
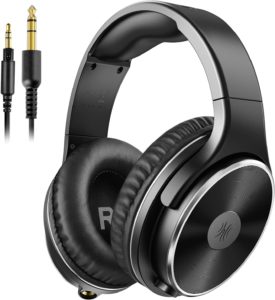
Over-the-ear Headphones

On-the-ear headphones have smaller ear cups with padding that rests on top of the ear. Both over-the-ear and on-the-ear use a headband of some sort to hold the ear cups securely over both ears. Over-the-ear has two significant advantages over on-the-ear headphones: 1) they more effectively seal out ambient noise that might distract from the received signal, and 2) they can fit more securely on the head and are not as susceptible to being dislodged by the vibrations of running and jumping. But on-the-ear headphones have the advantage when it comes to price and weight.
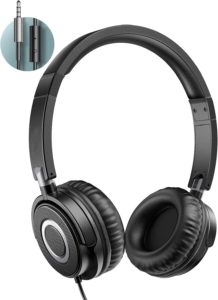
On-the-ear Headphones
Earphones

Earphones also come in two varieties: those that rest just within the ear canal and those that rest on the concha just outside the ear canal.  Naming conventions vary, but the latter are sometimes referred to as “earbuds,” so we’ll use that term too.  The former we’ll call “in-canal earphones.”
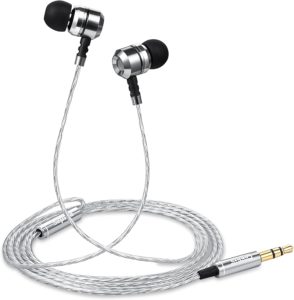
Common In-canal Earphones

In-canal earphones feature rubbery or spongy cushions that rest against the walls of the ear canal, helping to seal out external noises much as over-the-ear headphones do. And the cushion within the ear canal can also help keep them from slipping out during a competition. But some earbuds, particularly those designed to be worn during exercise, include a headband or behind-the-ear hook that holds them in place better than in-canal earphones lacking that feature. If you have some earphones you like, but they don’t stay securely in your ears, explore adding your own headband to help keep them in place.
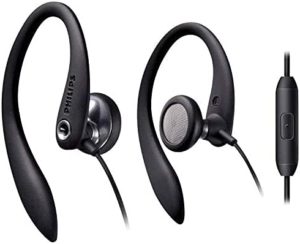
Sports Earbuds

The choice of headphones or earphones is a matter of personal preference and price. Both can deliver excellent sound. Both have options that will help them stay securely attached to you. But they both have an Achilles heel: that piece of wire with a penchant for getting snagged on branches: the cord. When snagged, you’re lucky if the cord only tugs the headphones off your head. Too often, the tug will break one of the essential wires inside the cord, leaving you deaf to the foxes’ signals.
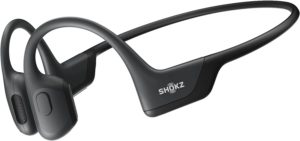
Bluetooth Sports Earbuds

Snaking the cord carefully through your shirt sleeve can help guard it against the tugs of trees and bushes. Attaching the cord to your clothing with several safety pins can help prevent tugs from yanking on the vulnerable plug and speaker connections. But even with all the defensive measures in place, the cord remains a vulnerability. Cords wear out. They are constantly being twisted and turned, causing their delicate wires to wear and break. So always (ALWAYS!) carry a spare earphone. The spare can be a bargain basement earphone (that thing the airline gave you and you stuck in a drawer). Pin it to your jersey, or place it inside a zipped pocket. Having a spare can mean the difference between completing the race with only a minute lost, or having to orienteer your way to the finish only to receive an OT.

Bluetooth

Nowadays, the headphone cord is optional: you can opt for Bluetooth headphones or earphones. What’s that? You say your receiver does not provide Bluetooth support? There’s a fix for that: Bluetooth support can be added using a Bluetooth transmitter.

There are two very important criteria for any Bluetooth transmitter product you choose to use for radio orienteering: it must provide reliable audio to your Bluetooth earpiece, and it must have low latency. The critical need for reliable audio is obvious, but low latency is almost as important. Your transmitter and Bluetooth earpiece must work together to provide audio with very little audio delay (latency). Otherwise, there will be a discernable lag between turning the antenna and when you will hear the resulting change in signal strength. That lag can result in bearing errors.

You must run some tests to determine if reliability and latency will be acceptable. Test your Bluetooth transmitter as soon as it arrives, and hold onto any receipts in case you need to return it. Attach the Bluetooth transmitter to your radio orienteering receiver, then pair it with your earpiece. Once paired, turn off the Bluetooth transmitter and earpiece. Turn them both on again. Do they quickly find one another and re-establish the audio flow every time? Repeat this test several times. There should be no problems getting audio to both your ears within ~10 seconds of powering up. And audio should continue to flow uninterrupted for hours, without significant glitches.

To test for acceptable latency, tune your radio-orienteering receiver to a signal and adjust the audio gain to a comfortable level. Point the antenna for maximum signal strength. Then quickly turn the antenna for minimum signal strength, then back again to maximum, and repeat. The volume of the sound in your ears should closely track the motion of the antenna. If the lag slows down your ability to quickly determine the precise antenna headings for maximum and minimum, then the lag is excessive.

Note: as of this writing, the author has not discovered a Bluetooth transmitter and earpiece combination that meets the two most important criteria (reliable audio and low latency). But I’ve only tested one highly-rated transmitter and earphone combination thus far. Bluetooth technology has come a long way and continues to improve rapidly. Acceptable hardware is probably out there somewhere or soon will be. Leave comments on what your results are.

While adding a Bluetooth transmitter and headphones or earphones will eliminate cord failures, it will also add new ways for your audio to fail. But hopefully, if you keep all batteries charged, failures will be less likely than when using a cord. But going Bluetooth is not likely to remove the requirement to carry a spare (plug-in type) earphone!
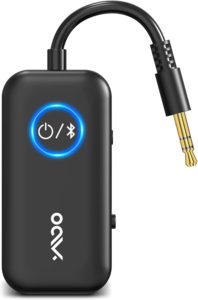
Bluetooth Transmitter

In addition to kicking the cord, going Bluetooth has another advantage: it provides more headphone options. Perhaps you already own a Bluetooth earpiece you’d like to use for radio orienteering. Bluetooth might prove to be your low-cost option in this situation – and provide some really cool features to boot.

Keep the Wet Out

Radio orienteering is played in all kinds of weather, which is a problem when it rains. Oh, you’ll muddle through and dry out with no harm done. But what about your radio equipment? Transmitters and receivers do not tolerate moisture. Water can render them temporarily inoperable or even damage them permanently. So it is imperative to keep water where it belongs: outside the equipment case.

The case surrounding the sensitive electronic innards of your equipment might look waterproof, but unless you’ve taken measures to make it so, it is a sure bet that it leaks like a sieve. Anywhere that water can seep, it will do so. That includes every hole, seam, and joint. It also includes all jacks, buttons, switches, and shafts. If it passes through the wall of the enclosure, it can leak.

So what to do? The answer: everything you can to keep water from penetrating the equipment box. There are several layers of defense. Let’s start with the outermost and work our way in.

Rainhat and Galoshes

The simplest, and least effective approach, is to keep the water from reaching the equipment. That can be accomplished by shielding the equipment with a suitable raincoat. A plastic bag can be quite effective for keeping rain from reaching a stationary transmitter. A bag is less effective for shielding a portable receiver swinging in a runner’s hand. First, the antenna elements will generally be too large to be inside, so they must penetrate the bag, resulting in holes for water to enter. Then there’s the headphone cable – creating yet another hole. Operating the receiver will require pinching knobs and switches through a layer of plastic or adding a large hole for the hand to fit through. Duct tape or electrical tape can help seal around all the punctures in the bag, but such measures might not last through a soggy race. The bottom line: bags are an unreliable method for protecting radio-orienteering receivers and should be used only as a last resort or as an extra layer of protection.

Sealing the Box

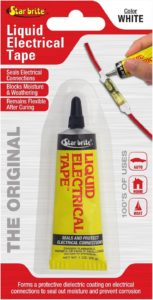
The next line of defense is the equipment case itself. Seams and gaps at panel and box interfaces can be covered by duct or electrical tape. They can also be filled using “Liquid Electrical Tape,” silicone glue, sealant, Plasti-Dip, or suitable paint.

When the gap involves a removable panel providing service access (like a battery compartment cover), the filler material needs to be temporary. Silicone paste (aka waterproof dielectric grease) is perhaps the best temporary filler. It is thick and long-lasting, harmless to rubber or plastic, and remains a thick paste even at high temperatures (unlike petroleum jelly). Silicone grease can be applied to jacks, switches, and around potentiometer shafts, where it will help seal out moisture even when those items are moved, rotated, or a plug is inserted. The downside to silicone grease is that it is messy and slippery when eventually, it spreads around the case and to other objects that come into contact with it. But it cleans up readily with soap and water or some rubbing alcohol. Some formulations are toxic and can irritate the eyes and skin. Follow label directions.

Putting some silicone grease into the headphone jack will do a good job of sealing it against water. The headphones simply plug in as usual, pushing the silicone grease aside, but leaving enough of it to seal around the plug. It is just the kind of application that silicone grease is designed for. Consider keeping some silicone grease available in your equipment bag for use on wet days.

Sealing Inside the Box

Inside the receiver’s enclosure, you might be able to access the backsides of the panel-mounted components. Sometimes, the back of a jack, potentiometer, or switch can be safely and readily coated with a sealant. Care should be taken to ensure the sealant does not seep into the component and damage it. Thoroughly sealing the back of a jack, switch, or potentiometer can effectively block moisture that would otherwise leak through. While sealing inside the box will keep water from getting inside the enclosure, it does not prevent it from getting inside the sealed components. Jacks, potentiometers, and switches with inward-facing surfaces sealed, still need to be protected from the outside or be thoroughly dried and treated with contact cleaner after any exposure to water.

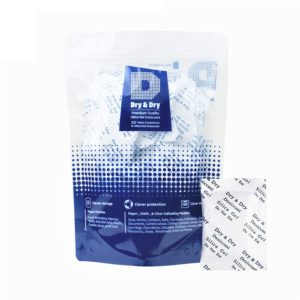
Once your equipment’s enclosure is thoroughly sealed, you might consider placing a small pack of desiccant inside it. The desiccant will remove moisture from the air inside the device. The resulting extremely-dry air is ideal for extending the life of electronic devices and will prevent condensation from forming on surfaces inside the enclosure when the device gets cold. The desiccant packet will need to be replaced (or recharged by heating) periodically, typically every 6 to 12 months.

Sealing the Board

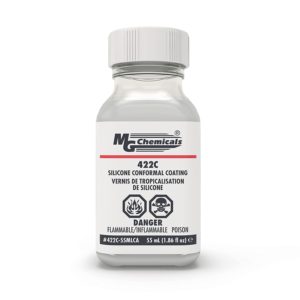
The last line of defense against water is at the board level. Printed circuit boards (PCBs) can be coated to protect them from moisture. A thorough conformal coating can render a PCB sufficiently waterproof to continue functioning normally even if immersed in water. But you might want to stop short of fully encasing a PCB in conformal coating. Many PCBs include trimmer resistors or capacitors, which would be rendered inoperable if sealed inside a conformal coating. Adjustable components such as those would be best left uncoated.

Oxidation is Our Enemy

There are two kinds of radio orienteering equipment: that which is experiencing electro-mechanical problems; and that which will experience electro-mechanical problems. You know the symptoms: volume controls sound scratchy, frequency controls cause unpredictable jumps, earphones sometimes don’t provide sound, and buttons and switches need to be jiggled before they will operate. Your previously reliable transmitter or receiver can no longer be counted on to function. Disaster! But there is a way to avoid most of those problems.

The Cause

Electro-mechanical parts will suffer whenever electronic equipment is placed in humid or dusty conditions. Electro-mechanical parts include buttons, switches, potentiometers, adjustable capacitors, jacks, and plugs. Pretty much anything that moves and contains mechanical wipers or contacts belongs in the electro-mechanical category.

Electro-mechanical components that are not hermetically sealed are vulnerable to the effects of humidity and dust. That’s because those devices rely on their surfaces remaining clean and electrically conductive. Oxidation occurs when these surfaces are exposed to the air, especially moist air. Impurities collect on surfaces when the air surrounding them contains dust or aerosols, and air always contains some level of moisture and dust. Oxidation and impurities are poor conductors of electricity and will eventually result in intermittent contact between otherwise-conductive surfaces.

Keeping your equipment clean, and storing it in a dry and clean location, will delay the onset of problems. But, eventually, the day will come when problems arise. Fortunately, there is usually a cure.

The Solution

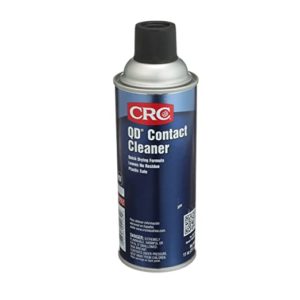
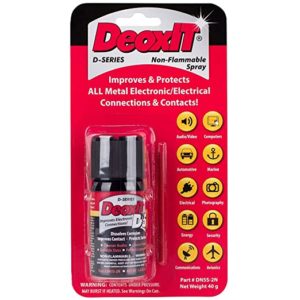
Contact cleaners can save the day. Contact cleaners are available in spray cans or liquid dispensers sporting small nozzles or applicator brushes. Just about any contact cleaner product that advertises itself as safe for electronics and plastics will effectively remove oxidation and contaminants from electro-mechanical components and thereby restore them to normal operation. It is just a matter of figuring out how to get the cleaner to the surfaces needing cleaning. Sometimes that is easily accomplished, but some components prevent access to their innards where those surfaces are located. Applying generous amounts of contact cleaner to the outside of an electro-mechanical component while operating it will usually result in the contact cleaner working its way into the component and reaching the surfaces needing a good cleaning.

Some contact cleaners are “no residue.” After application, they dry completely, leaving nothing behind. No-residue cleaners perform their cleaning action only while they are in contact with a surface, helping to dissolve and remove contaminants where surfaces rub against each other, and then they are gone. No-residue cleaners are good for cleaning plugs and exterior surfaces where you don’t want to have anything that might get on your hands.

Other contact cleaners leave behind a protective film. These products are sometimes called “lubricating.” After their solvents have dispersed, a thin protective layer remains that lubricates and helps delay oxidation’s return. Lubricating contact cleaners are well-suited for equipment that will spend part of its life outdoors or in moist conditions.

Both no-residue and lubricating contact cleaners can be applied preventatively before problems occur. The periodic application will help avoid unexpected equipment problems. Despite being safe for plastic, both types of products contain solvents that might dissolve paints, dies, and ink. So avoid getting them on any vulnerable markings you have applied to your equipment.