
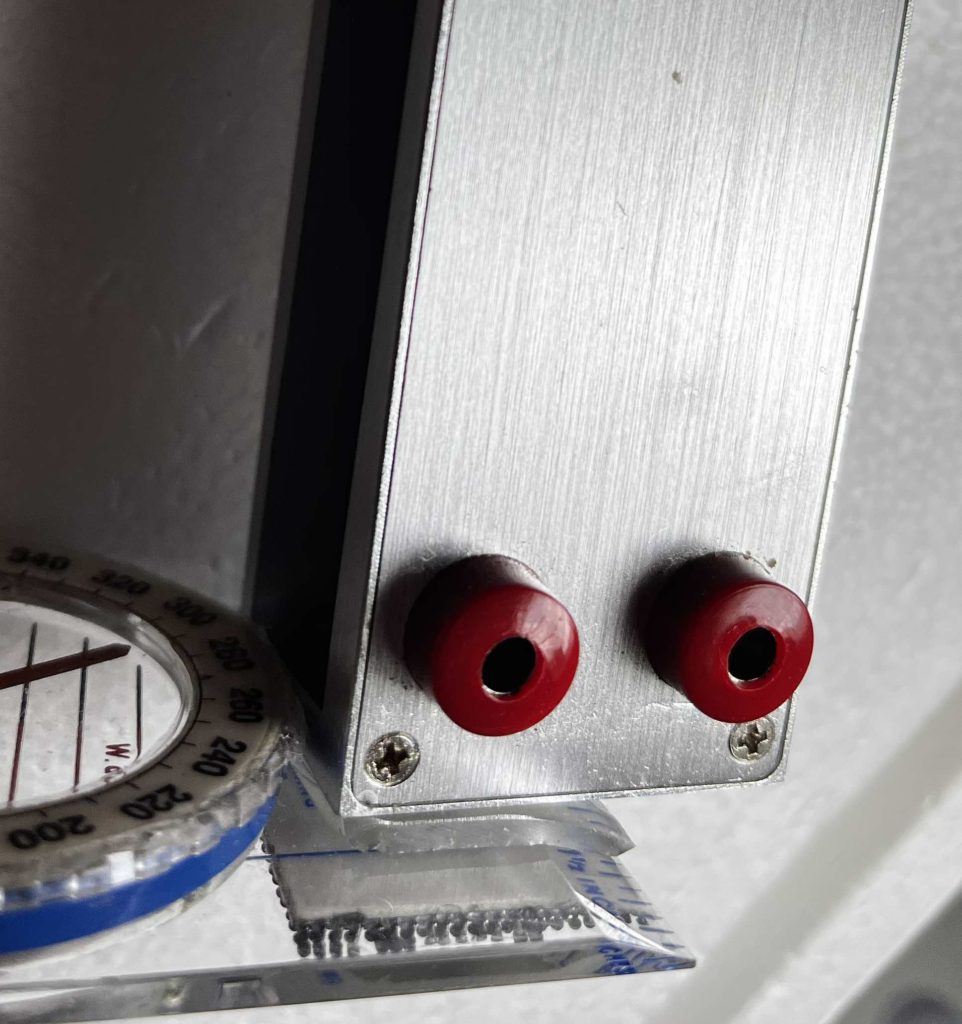
Some radio orienteering receivers, especially those made in Europe, come with banana headphone jacks. These are especially nice because they are quite durable, waterproof, and make a clean, reliable connection every time.
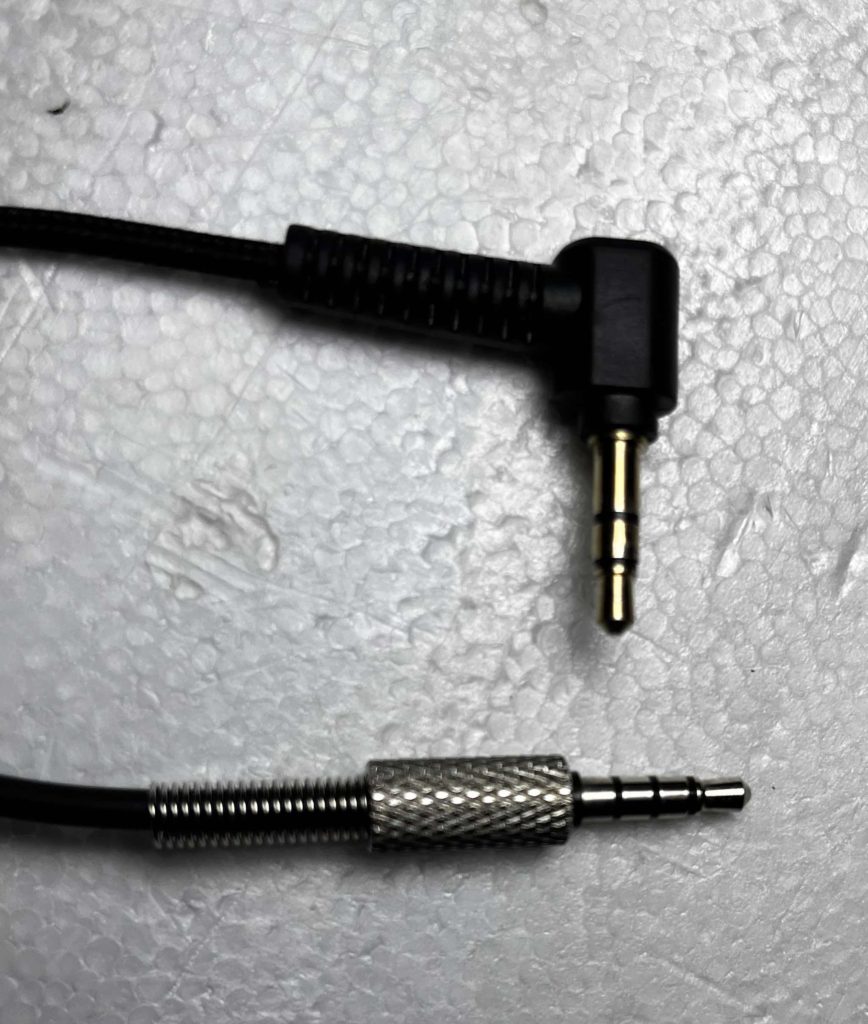
Unfortunately, most commercial headphones come with a 3.5mm (1/8″) stereo plug. If the headphones include a microphone, then they will have a 3.5mm (1/8″) TRRS plug.
Whether your headphones include a microphone or not, here’s how to get your headphones to plug into your banana-jack-equipped receiver and work as they are supposed to.
Figures 1 and 2 below show how headphones are wired to their plugs. If your headphones include a built-in microphone, then they use a slightly different audio plug, but they are wired almost identically.
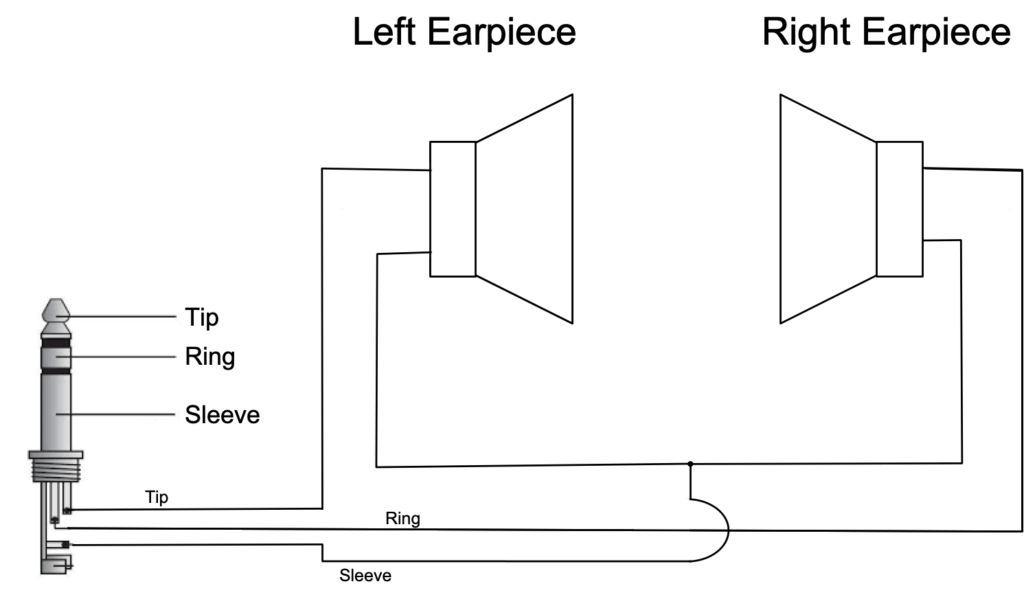
Figure 1: Wiring diagram of most non-microphone headphones
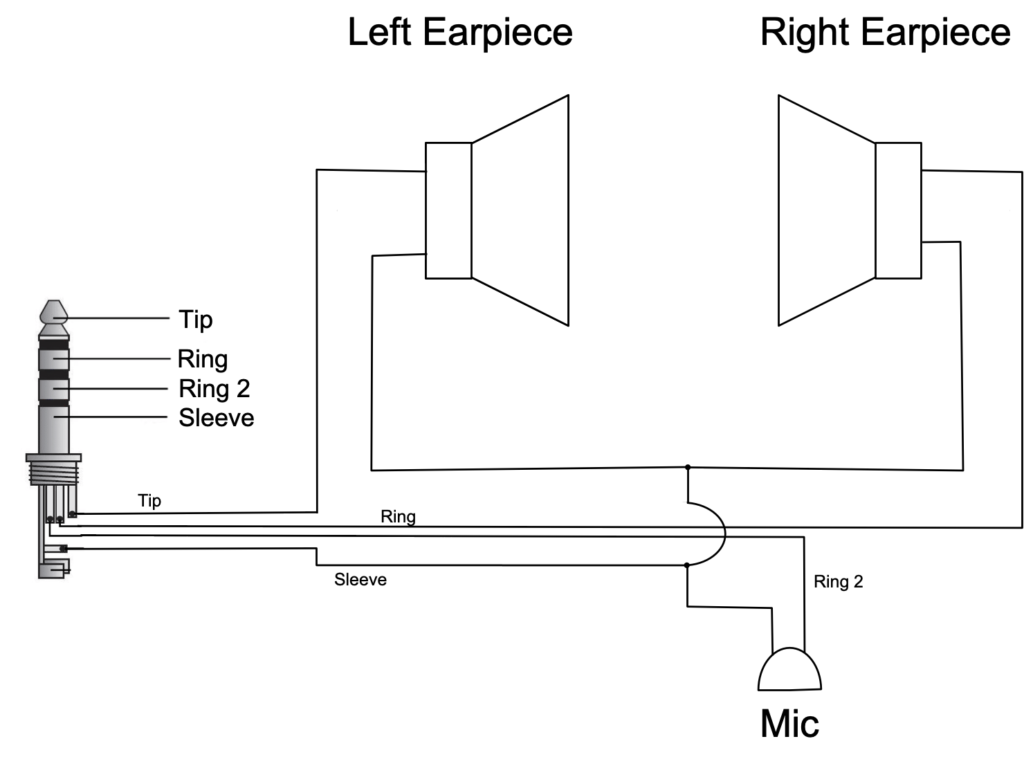
Figure 2: Wiring diagram of most Microphone-equipped (TRRS) headphones
There are two possible ways to wire the earpieces to a banana plug: series or parallel. Your choice of series or parallel will be influenced by the headphones you intend to use and your receiver. Most radio orienteering receivers will work fine with headphone impedances between 8-ohms and 32-ohms. Typical headphones (but not all) have earpiece impedances of ~32 ohms. By wiring the earpieces in series, the total headphone impedance will be the sum of the earpieces (typically 64 ohms). By wiring the earpieces in parallel, the total headphone impedance will be half the impedance of one earpiece (typically 16 ohms). You should check your receiver’s User Manual to determine the range of headphones impedances it will accept. Both series and parallel wiring approaches are described below.
Series Earpiece Wiring
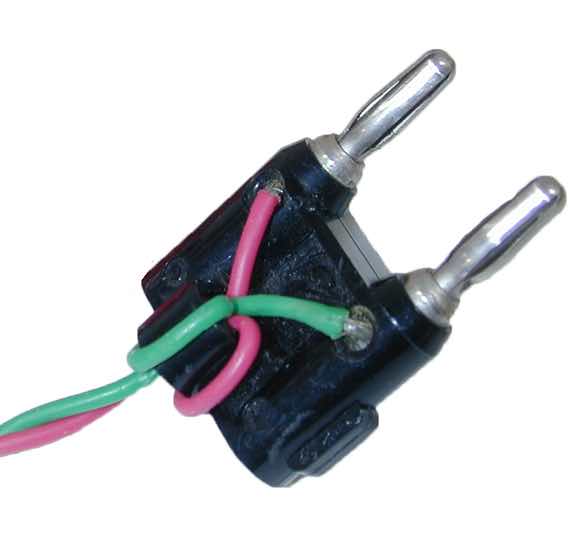
Regardless of whether your headphones have a microphone or not, what you need to do is connect the Tip to one of the banana plug jacks and the Ring to the other. Sleeve and Ring 2 can be left disconnected. The result is that the left and right earpieces are wired in series and connected to each side of the banana plug. Figure 3 below shows what you are trying to achieve.
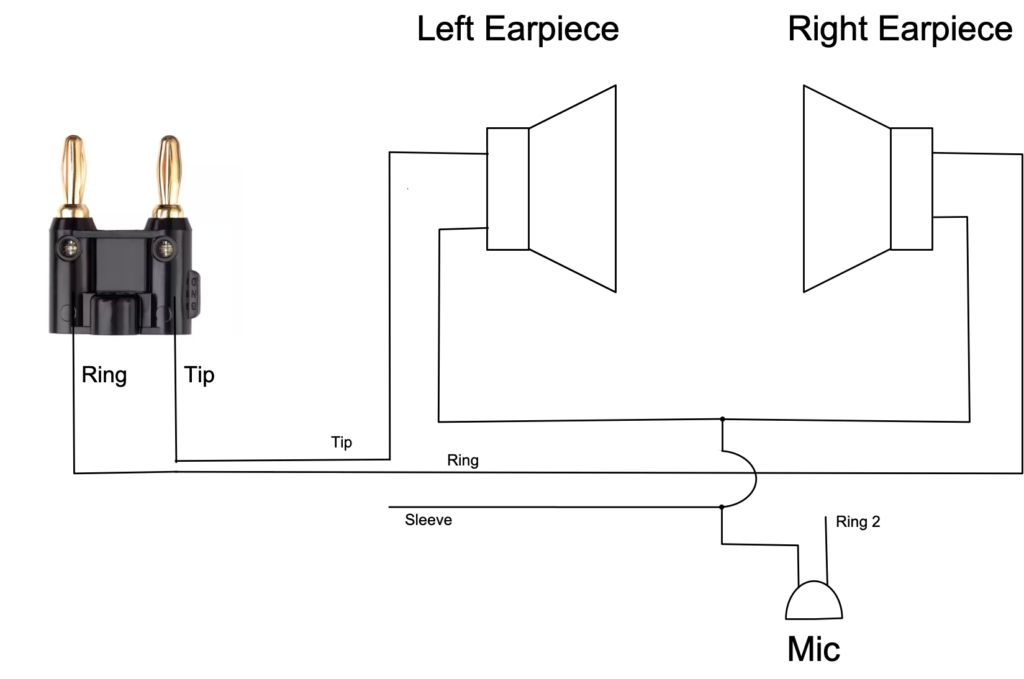
Figure 3: Wiring diagram for series earpiece connection
Parallel Earpiece Wiring
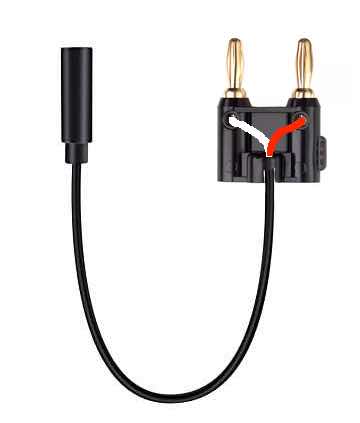
Regardless of whether your headphones have a microphone or not, what you need to do is connect the Tip and Ring wires to one of the banana plug jacks and the Sleeve to the other. Ring 2 can be left disconnected. The result is that the left and right earpieces are wired in parallel and connected to each side of the banana plug. Figure 4 below shows what you are trying to achieve.
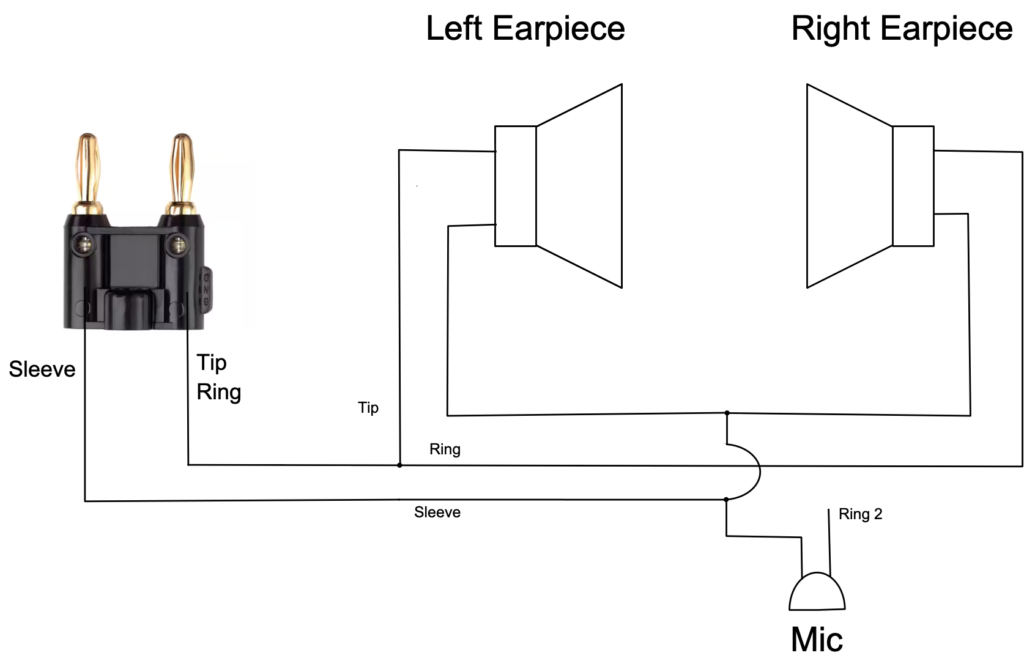
Figure 4: Wiring diagram for parallel earpiece connection
The simplest way to accomplish the wiring shown in Figure 3 (for series) or Figure 4 (for parallel) is to simply cut off the headphone’s 3.5mm (1/8″) plug and replace it with a dual banana plug, wiring it as shown in the appropriate figure above.
If you want to keep the headphone’s plug intact, then what you need is a 3.5mm-to-banana adapter. I’ve never seen one sold commercially, so you must make it yourself. But you are in luck. They are easy to build.
3.5mm-to-banana adapter
Suitable parts to build an adapter are available from Mouser, Digi-Key, and other electronics parts retailers. But you can avoid most of the soldering (and some aggravation) by purchasing a cable assembly on Amazon. If that link didn’t work, simply search Amazon.com for “3.5mm Female Jack to Bare Wire Open End TRS 3 Pole Stereo“. Be sure to purchase a cable that has the female jack on one end (not the plug) and looks like the following image.
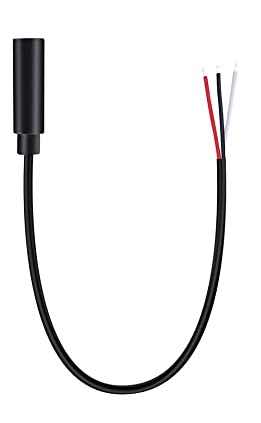
3.5mm Female Jack to Bare Wire TRS 3-pole Stereo Cable
Now, all you need is a dual banana plug, which can also be found on Amazon. Just search for “dual banana plug.” They are commonly available and used for hooking speakers to entertainment systems. The plugs are not a perfect match for the banana plugs found on Eastern European radio orienteering equipment, but they are close enough to work well. Two separate single banana plugs will also work just fine.
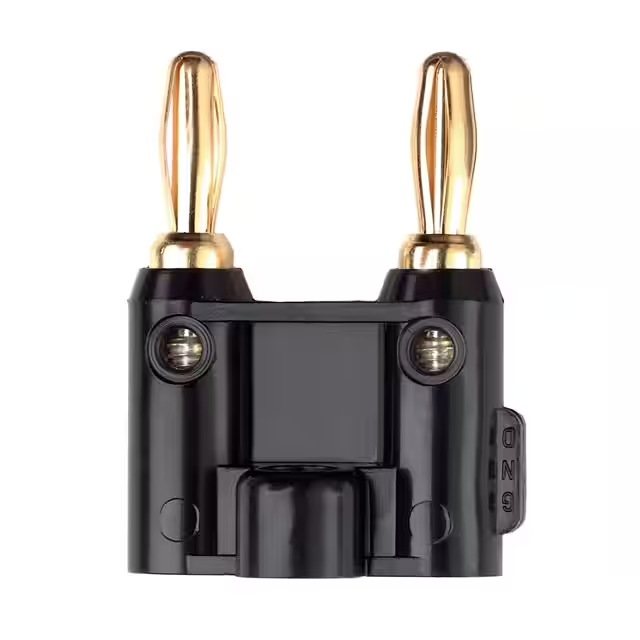
Dual Banana Plug
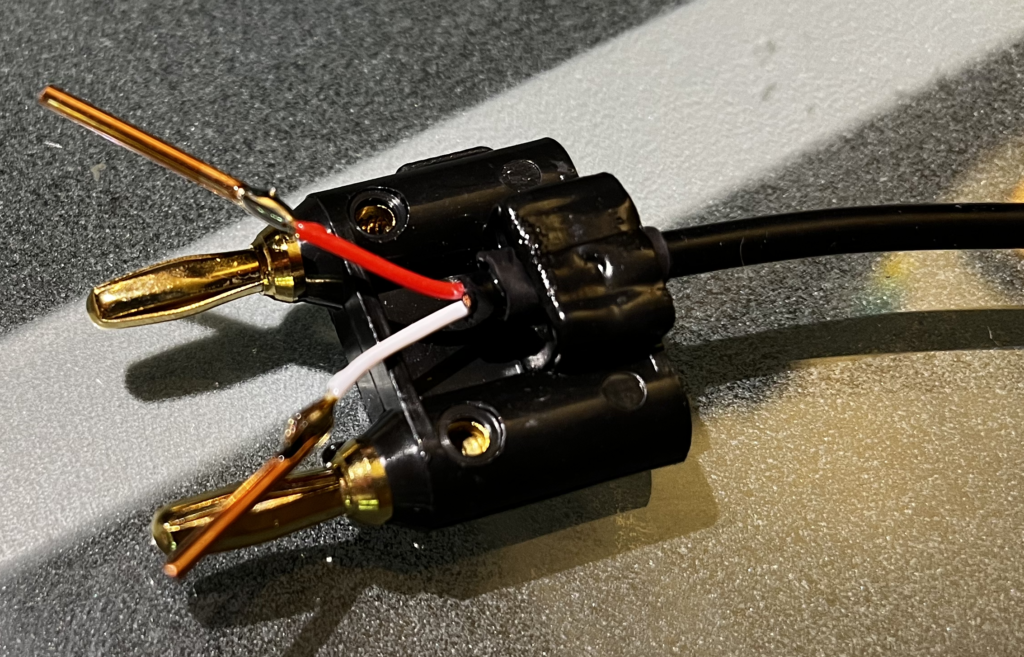
No soldering is required for the banana plug shown above. Attach the red wire to one side of the banana plug and the white wire to the opposite. The black wire can be removed. The wires attach using the banana plugs’ tightening screws. Note the strain relief used in the image below. You’ll want to do something similar to avoid having the wires pull loose from the plug.
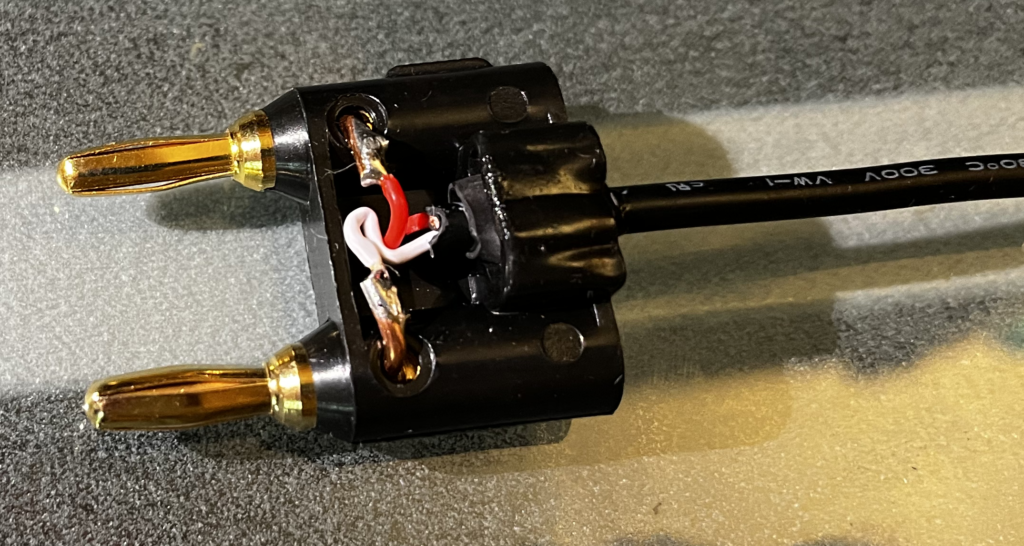
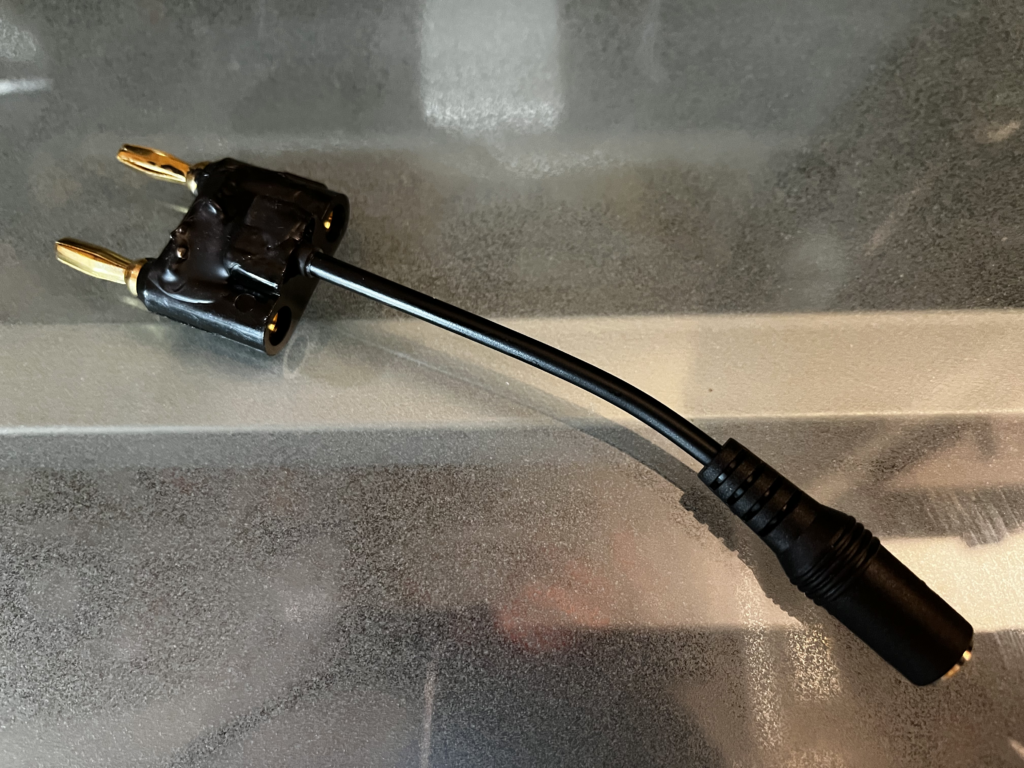
What you are aiming for is something like this for series earpiece wiring:
For wiring the earpieces in parallel you’re trying to make an adapter something like the following. Note that the Tip and Ring wires both go to one pin of the banana jack, and only the Sleeve goes to the other pin.

The banana plug screws may be too aggressive for the fine wires used in the cable assembly. If so, tightening them down will cut right through the fine wire strands, severing the end of the wire like a guillotine. A heavier gauge solid copper wire will fare much better. This is the only soldering that might be required in this project: add some solid copper wire extensions as shown below.
Note that the cable should be passed through the banana plug’s cable retention loop. A small cable tie could be used to affix the cable to the loop and provide strain relief. Alternatively, as was done above, the retaining loop can be heated using a heat gun to near its melting point and then deformed by pressing the molten plastic down onto the cable to help retain it.
The solid copper wires should then be bent at a 90-degree angle and inserted into the wiring holes of the banana plug and tightened down. Any excess cable wires can be tucked into the small cavity between the plugs as shown:
Finally, some Plasti Dip can be poured over the wires to pot them in the small cavity, making a rugged, waterproof, permanent installation.
Keep your shiny new adapter working like new by periodically applying some contact cleaner to the headphone jack.